honeywell 8000 install manual
Honeywell VisionPRO 8000 Installation Manual: A Comprehensive Plan
This manual details the installation and setup of the Honeywell VisionPRO 8000 thermostat‚ covering electrical connections‚ system tests‚ and Wi-Fi integration.
Download the PDF for detailed instructions‚ including safety precautions‚ wiring diagrams‚ and troubleshooting common issues for optimal performance.
Master your device with this guide‚ ensuring a smooth installation process and maximizing the benefits of your new smart thermostat system.
The Honeywell VisionPRO 8000 is a smart thermostat designed to provide efficient and convenient control of your home’s heating and cooling systems. This thermostat offers advanced features like Wi-Fi connectivity‚ allowing remote access and control through the Honeywell Home app.
This installation manual provides a step-by-step guide to ensure a successful setup‚ from safely disconnecting power to configuring system settings. It’s crucial to carefully follow these instructions to avoid damage to the thermostat or your HVAC system.
The VisionPRO 8000 is compatible with a wide range of heating and cooling systems‚ offering customizable programming options to optimize energy savings and comfort. Proper installation and configuration are key to unlocking its full potential.
Safety Precautions & Warnings
Prior to installation‚ always disconnect power to your heating and cooling system at the breaker box to prevent electrical shock. Failure to do so can result in serious injury or death. If replacing a thermostat containing mercury‚ handle the old unit with extreme care and do not discard it in regular trash.

Follow local waste management guidelines for proper mercury disposal. Incorrect handling poses environmental hazards. This installation should be performed by a qualified technician if you are unfamiliar with electrical wiring.
Always adhere to local electrical codes and regulations during installation. Improper wiring can damage the thermostat and your HVAC system.
2.1 Disconnecting Power Before Installation
Crucially‚ before commencing any installation steps‚ completely disconnect power to your heating and cooling system at the main breaker panel. This is a non-negotiable safety precaution to prevent potential electrical shock during wiring. Locate the breaker controlling your HVAC system and switch it to the “OFF” position.
Double-check with a non-contact voltage tester to confirm that no power is reaching the existing thermostat wires. Never assume the power is off based solely on the breaker position. This verification step is vital for your safety.
Proceed with installation only after confirming a complete power disconnect.
2.2 Mercury Disposal Guidelines
If your old thermostat contains mercury in a sealed tube – a common feature in older models – do not dispose of it in regular household trash. Mercury is a hazardous material and requires special handling to protect the environment and public health.
Contact your local waste management authority for specific instructions on proper recycling and disposal procedures in your area. Many communities offer designated collection programs for mercury-containing devices.
Do not attempt to disassemble the old thermostat yourself‚ as this could release mercury vapor. Responsible disposal is essential.
Package Contents & Verification
Upon opening the Honeywell VisionPRO 8000 package‚ carefully verify that all listed components are present and undamaged. The standard package should include the thermostat display unit‚ the base plate for wall mounting‚ mounting screws and anchors‚ wire labels‚ and this installation manual.
Inspect each item for any signs of shipping damage‚ such as cracks or dents. If any parts are missing or appear damaged‚ do not proceed with the installation.
Contact Honeywell Support immediately to report the issue and request replacements before beginning the installation process. Proper verification ensures a smooth setup.
Tools Required for Installation
To successfully install your Honeywell VisionPRO 8000 thermostat‚ gather the following tools before you begin. A Phillips head screwdriver is essential for securing the base plate and thermostat display. You’ll also need a flathead screwdriver for certain terminal connections.
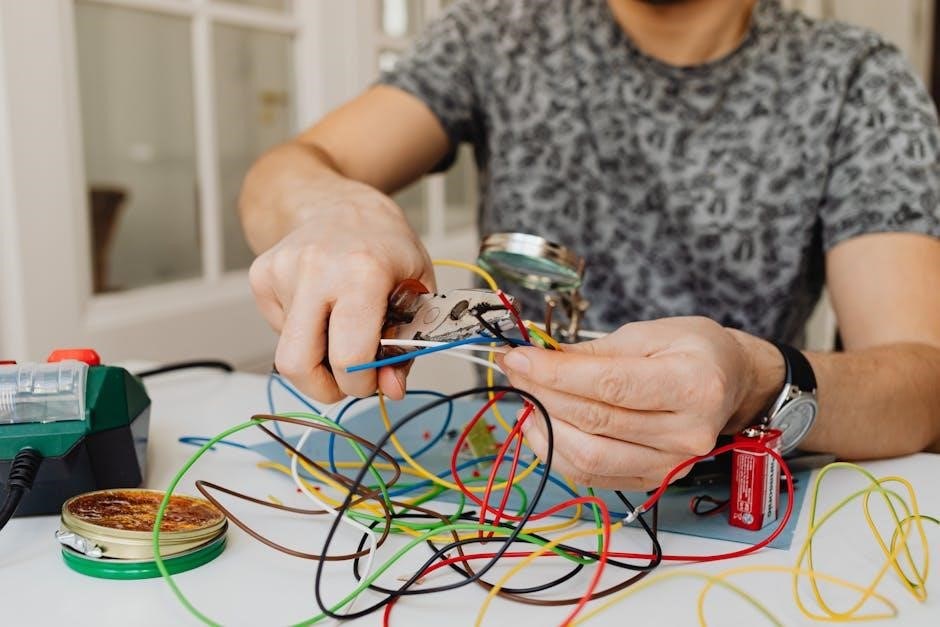
A wire stripper/cutter will be necessary for preparing the thermostat wires. A level ensures the thermostat is mounted straight. A small drill may be required for creating pilot holes for the mounting screws‚ depending on your wall type.
Finally‚ have a pencil for marking wire locations and a voltage tester for safety verification.
System Compatibility Check
Before installing the Honeywell VisionPRO 8000‚ confirm compatibility with your existing heating and cooling systems. This thermostat supports most 24V heating and cooling systems‚ including forced air‚ heat pump‚ and radiant heat.
However‚ it’s crucial to verify if your system utilizes millivolt systems or proprietary communication protocols‚ as these may not be compatible. Check your current thermostat’s wiring to identify the system type.
Consult the detailed compatibility list in the full installation manual or on the Honeywell Home website to ensure a seamless integration and optimal performance.
5.1 Compatible Heating Systems

The Honeywell VisionPRO 8000 thermostat is widely compatible with common heating systems. These include forced air furnaces (gas‚ oil‚ electric)‚ hot water baseboard systems‚ and steam heating systems utilizing a 24V control wire.
Heat pump systems are also supported‚ including those with auxiliary or emergency heat. However‚ compatibility with modulating furnaces or systems requiring proprietary communication protocols should be verified before installation.
Always refer to the comprehensive compatibility list within the installation manual or on the Honeywell Home support website to confirm your specific heating system is supported.
5.2 Compatible Cooling Systems
The Honeywell VisionPRO 8000 thermostat seamlessly integrates with a broad range of cooling systems. This includes central air conditioning units‚ heat pumps operating in cooling mode‚ and dual-fuel systems combining both gas and electric cooling.
Standard 24V cooling systems are fully supported‚ offering reliable temperature control. However‚ systems utilizing proprietary communication or advanced zoning configurations may require additional setup or compatibility verification.
Consult the detailed compatibility documentation available in the installation manual or on the Honeywell Home website to ensure your cooling system is fully supported before proceeding with installation.
Removing the Old Thermostat
Before installing the VisionPRO 8000‚ carefully remove your existing thermostat. Crucially‚ disconnect power to the HVAC system at the breaker box to prevent electrical shock.
Take detailed photos of the existing wiring connections as a reference. Label each wire with the corresponding terminal designation on the old thermostat – this is vital for correct re-connection.
Gently disconnect the wires‚ avoiding any shorts. If the old thermostat contains mercury‚ handle it with extreme care and follow local disposal guidelines; do not discard it in regular trash.
6.1 Labeling Existing Wires
Accurate wire labeling is paramount for a successful Honeywell VisionPRO 8000 installation. Before disconnecting any wires from your old thermostat‚ use the provided labeling stickers.
Carefully match each wire to its corresponding terminal designation on the existing thermostat – typically denoted by letters like R‚ W‚ Y‚ G‚ and C. Write this letter clearly on the corresponding label.
Securely attach the labels to each wire‚ ensuring they won’t fall off during the disconnection process. Detailed photos can also serve as a backup reference‚ but labels are essential.
6.2 Disconnecting Wires from Old Thermostat
With the power OFF at the breaker‚ and wires meticulously labeled‚ you can now disconnect them from the old thermostat. Gently loosen the screws holding each wire in place – avoid forcing them.
Carefully pull each wire straight out‚ avoiding any bending or damage. Keep the wires separated to prevent confusion. Double-check that each wire remains with its corresponding label.
If wires are stiff‚ a slight wiggle may help; Never pull on the wire itself; instead‚ grip the insulated portion near the terminal. Ensure no wires fall back into the wall cavity.
Mounting the VisionPRO 8000 Base Plate
Using the included screws‚ securely mount the VisionPRO 8000 base plate to the wall. Ensure the base plate is level for a professional appearance and proper thermostat function. Utilize the existing screw holes from the previous thermostat whenever possible‚ otherwise‚ use a drill to create new ones.
If wall anchors are needed‚ install them before attaching the base plate. Confirm the base plate is flush against the wall‚ avoiding any gaps. Double-check that the base plate is firmly secured before proceeding.
A stable base is crucial for correct wiring and thermostat operation.
Wiring the VisionPRO 8000
Carefully connect the wires to the corresponding terminals on the VisionPRO 8000 base plate. Refer to the wiring diagram in the manual and the labels you applied during old thermostat removal. Ensure each wire is securely fastened to its terminal‚ avoiding loose connections.
Common terminals include R‚ C‚ W‚ Y‚ and G. Double-check the wiring configuration before proceeding. Incorrect wiring can damage the thermostat or your HVAC system. If unsure‚ consult a qualified HVAC technician.
Proper wiring is essential for correct thermostat operation and system control.
8.1 Identifying Terminal Connections
The VisionPRO 8000 utilizes specific terminals for various HVAC system components. ‘R’ designates the 24V power source‚ while ‘C’ is the common wire‚ crucial for consistent power. ‘W’ controls heating‚ ‘Y’ activates cooling‚ and ‘G’ manages the fan. Additional terminals may exist for auxiliary heat (AUX) or emergency heat (E).
Carefully examine the thermostat base plate; each terminal is clearly labeled. Refer to your HVAC system’s wiring diagram to accurately identify each wire’s function. Incorrectly identifying and connecting wires can lead to system malfunction or damage.
Understanding these connections is vital for a successful installation.
8.2 Connecting the Wires to the Base Plate
Once wires are identified‚ carefully insert them into the corresponding terminals on the VisionPRO 8000 base plate. Ensure each wire is securely fastened; a loose connection can cause intermittent operation or system failure. Use a small screwdriver to tighten the terminal screws‚ but avoid over-tightening.
Double-check all connections against your wiring diagram and the identified terminal labels. Gently tug on each wire to confirm it’s firmly held in place. Properly seated wires are essential for reliable communication between the thermostat and your HVAC system.
Take your time and verify each connection before proceeding.
Attaching the Thermostat Display
After wiring is complete and verified‚ carefully align the thermostat display with the mounted base plate; Gently press the display onto the base until it clicks securely into place. Avoid forcing it; ensure proper alignment to prevent damage to the connectors.
A firm‚ even connection is crucial for the display to function correctly. Visually inspect the edges of the display to confirm it’s flush against the base plate. If it doesn’t seat properly‚ re-check the wiring and alignment before attempting to reattach.
This step completes the physical installation of the VisionPRO 8000.
Powering On and Initial Setup
Restore power to the HVAC system at the breaker panel. The VisionPRO 8000 display should illuminate‚ initiating the startup sequence. Follow the on-screen prompts to begin the initial setup process. This typically involves selecting your language‚ date‚ and time settings.
The thermostat will guide you through a series of questions to configure basic system parameters. Accurately answer these questions to ensure proper operation of your heating and cooling systems. Pay close attention to prompts regarding system type and fuel source.
This initial setup is vital for optimal performance.
Connecting to Wi-Fi Network
Access the Wi-Fi settings on the VisionPRO 8000 thermostat display. Navigate to the network menu and select your desired Wi-Fi network from the available list. Enter your network password carefully‚ ensuring accuracy to establish a secure connection.
The thermostat will attempt to connect to the network. A successful connection is indicated by a Wi-Fi symbol appearing on the display. If the connection fails‚ double-check your password and ensure your router is functioning correctly.
Wi-Fi connectivity enables remote control and access to advanced features via the Honeywell Home app.

Setting Installer Options
Access the installer setup menu on your Honeywell VisionPRO 8000 thermostat. This section allows customization of system parameters for optimal performance. Configure the system type – selecting from options like forced air‚ heat pump‚ or radiant heat – is crucial for accurate operation.
Adjust fan control settings to define how the fan operates with heating and cooling. Configure parameters like cycle rate and minimum on/off times to match your system’s requirements. Proper setup ensures efficient and comfortable climate control.
Save your settings before exiting the installer menu.

12.1 System Type Configuration
Accurate system type selection is vital for the Honeywell VisionPRO 8000’s functionality. Navigate to the system type setting within the installer options menu. Choose from available options including forced air‚ warm air‚ hot water‚ steam‚ or heat pump systems.
Heat pump configurations require specifying auxiliary heat settings. For multi-stage systems‚ define the number of heating and cooling stages; Incorrect configuration can lead to inefficient operation or inaccurate temperature control.
Verify your selection carefully before saving. Refer to your HVAC system’s documentation if unsure about the correct type.
12.2 Fan Control Settings
The Honeywell VisionPRO 8000 offers flexible fan control options within the installer settings. Configure fan operation to cycle‚ on‚ or auto modes. ‘Cycle’ mode runs the fan periodically for improved air circulation. ‘On’ mode keeps the fan running continuously.
‘Auto’ mode operates the fan only during heating or cooling cycles. Adjust fan speed settings if your system supports variable speed fans. Proper fan control enhances comfort and energy efficiency.
Consider your home’s needs and HVAC system capabilities when selecting fan settings. Incorrect settings may impact temperature distribution and energy consumption.
Programming the Thermostat
The Honeywell VisionPRO 8000 allows for customized scheduling to optimize comfort and energy savings. Program different temperature settings for various times of the day and days of the week. Utilize the thermostat’s intuitive interface or the Honeywell Home app for easy programming.
Create personalized schedules based on your lifestyle and occupancy patterns. Consider using setback temperatures when you’re away or asleep to reduce energy consumption. Explore pre-programmed schedules as a starting point and adjust them to your preferences.
Regularly review and update your programming to ensure it aligns with your needs.
Understanding the Thermostat Display
The Honeywell VisionPRO 8000 features a clear‚ backlit display providing essential information at a glance. Key elements include the current temperature‚ setpoint temperature‚ operating mode (heat‚ cool‚ auto‚ off)‚ and time. Icons indicate system status‚ such as fan operation and Wi-Fi connectivity.
Navigate the menu using the touchscreen or physical buttons to access advanced settings and programming options. Pay attention to alert icons that signal potential issues‚ like low batteries or system errors. The display also shows humidity levels and outdoor temperature (if connected to a remote sensor).
Familiarize yourself with the display’s layout for efficient operation.
System Test Procedures
After installation‚ thorough testing is crucial to ensure proper functionality of your Honeywell VisionPRO 8000; Begin by testing the heating system; set the thermostat to heat mode and verify warm air is distributed. Next‚ test the cooling system by setting it to cool and confirming cool air circulation.
Check fan operation in auto and on modes. Confirm the thermostat responds correctly to temperature adjustments. Verify Wi-Fi connectivity and remote control via the Honeywell Home app. Address any discrepancies immediately‚ referencing the troubleshooting section of this manual.
Successful testing guarantees a comfortable and efficient home climate.
Troubleshooting Common Issues
Encountering problems? This section offers solutions to frequent Honeywell VisionPRO 8000 issues. If the thermostat lacks power‚ check the circuit breaker and wiring connections. For Wi-Fi connection difficulties‚ ensure correct network credentials and router functionality.
If heating or cooling isn’t functioning‚ verify system compatibility and wiring accuracy. A blank display often indicates a power issue. Consult the manual’s detailed diagrams for wiring assistance. Resetting the thermostat can resolve minor glitches.
For persistent problems‚ contact Honeywell support for expert assistance.
16.1 No Power to Thermostat
If your Honeywell VisionPRO 8000 displays no power‚ begin by verifying the circuit breaker controlling the HVAC system hasn’t tripped. Inspect the thermostat wiring‚ ensuring all connections are secure and correctly placed on the base plate terminals. Confirm the ‘C’ wire (common wire) is properly connected‚ as it’s essential for consistent power.

Check the furnace or air handler’s power switch to ensure it’s turned on. A blown fuse within the HVAC system can also cause a power outage to the thermostat. If issues persist‚ temporarily remove the thermostat from the base plate to test for continuity in the wiring.
16.2 Wi-Fi Connection Problems
Experiencing Wi-Fi connectivity issues with your Honeywell VisionPRO 8000? First‚ confirm your home Wi-Fi network is functioning correctly with other devices. Ensure the thermostat is within range of your router; excessive distance or obstructions can weaken the signal. Double-check the Wi-Fi password entered during setup for accuracy – case sensitivity matters!
Restart both your router and the thermostat. If problems continue‚ try temporarily disabling the router’s firewall or security settings to see if they’re interfering. Refer to Honeywell’s support website for specific troubleshooting steps and firmware updates that may resolve connectivity issues.
Honeywell Home App Integration
Unlock the full potential of your VisionPRO 8000 by integrating it with the Honeywell Home app! This app enables remote control of your thermostat from anywhere with an internet connection. Monitor and adjust temperatures‚ create custom schedules‚ and receive alerts – all from your smartphone or tablet.
Download the Honeywell Home app from the App Store or Google Play. Follow the in-app instructions to connect your thermostat to your account. Enjoy features like geofencing‚ which automatically adjusts temperatures based on your location‚ and energy usage reports for optimized savings.
Advanced Features & Settings
The VisionPRO 8000 offers a suite of advanced features to personalize your comfort and optimize energy efficiency. Explore customizable scheduling options‚ creating unique temperature profiles for each day of the week. Utilize smart recovery to ensure your home reaches the desired temperature precisely when you need it.

Delve into settings for fan control‚ humidity management‚ and filter change reminders. Configure alerts for extreme temperatures or system malfunctions. Access detailed energy reports within the Honeywell Home app to track usage and identify potential savings. Fine-tune your system for peak performance and convenience.
Maintenance and Cleaning
Regular maintenance ensures optimal performance and longevity of your Honeywell VisionPRO 8000 thermostat. Clean the thermostat display with a soft‚ dry cloth to remove dust and fingerprints. Avoid using liquid cleaners or abrasive materials‚ as these can damage the screen.
Periodically check the wiring connections to ensure they remain secure. Replace air filters regularly‚ as recommended by the filter manufacturer‚ to maintain efficient airflow. Inspect the base plate for any signs of corrosion or damage. Simple upkeep will keep your system running smoothly for years to come.
Warranty Information
Honeywell offers a limited warranty on the VisionPRO 8000 thermostat‚ protecting against defects in materials and workmanship. The standard warranty period is typically one year from the date of purchase‚ but may vary depending on the retailer and region. Proof of purchase is required to make a warranty claim.
This warranty does not cover damage caused by improper installation‚ misuse‚ or neglect. For complete warranty details‚ including exclusions and limitations‚ please refer to the warranty card included with your thermostat or visit the Honeywell Home website. Register your product online to activate your warranty.
Recycling Information
Honeywell is committed to environmental responsibility. When replacing your old thermostat with the VisionPRO 8000‚ properly dispose of the old unit. If your previous thermostat contains mercury in a sealed tube‚ do not discard it in regular trash. Contact your local waste management authority for specific recycling and disposal instructions.
Electronic components should be recycled whenever possible to conserve resources and reduce landfill waste. Check with your local recycling center or electronics retailer for drop-off locations. Visit the Honeywell website for additional information on recycling programs and environmental initiatives.
Contacting Honeywell Support
For assistance with your Honeywell VisionPRO 8000 thermostat‚ several support options are available. Visit the official Honeywell Home website for a comprehensive FAQ section‚ troubleshooting guides‚ and downloadable resources. You can also access online chat support for immediate assistance with common issues.
If you prefer to speak with a representative‚ call Honeywell Customer Care. Phone numbers and operating hours are listed on the Honeywell Home website. Ensure you have your model number readily available when contacting support. Additional support and documentation can be found through authorized Honeywell dealers and installers.