dental implant post op instructions
Dental Implant Post-Op Instructions: A Comprehensive Guide
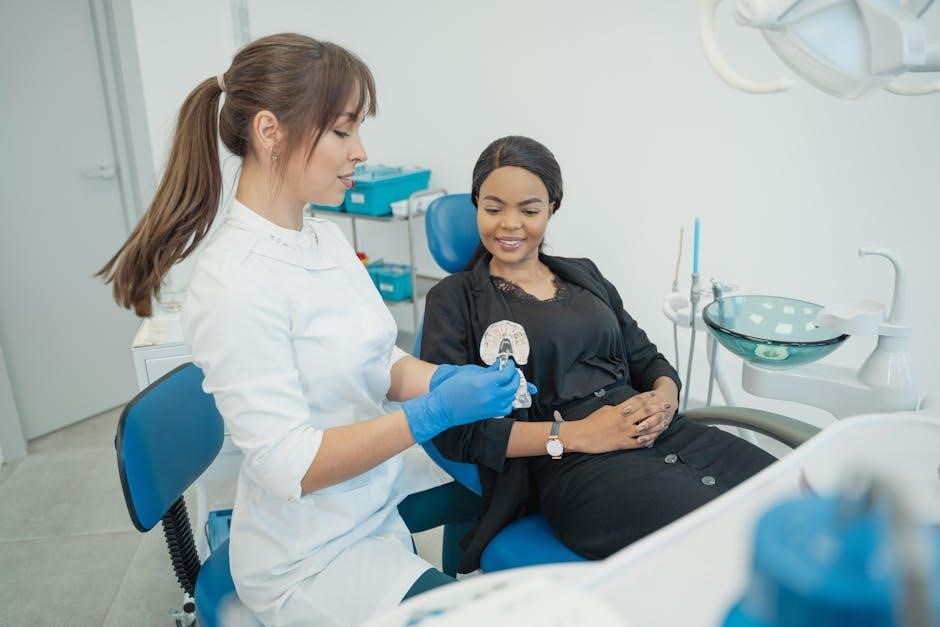
Navigating recovery requires calm and accessible communication with your dentist. Expect swelling and discomfort‚ with guidance provided to minimize these effects.
Dental health programs‚ like the Child Dental Benefits Schedule (CDBS) in Australia‚ emphasize regular check-ups and preventative care for optimal oral wellbeing.
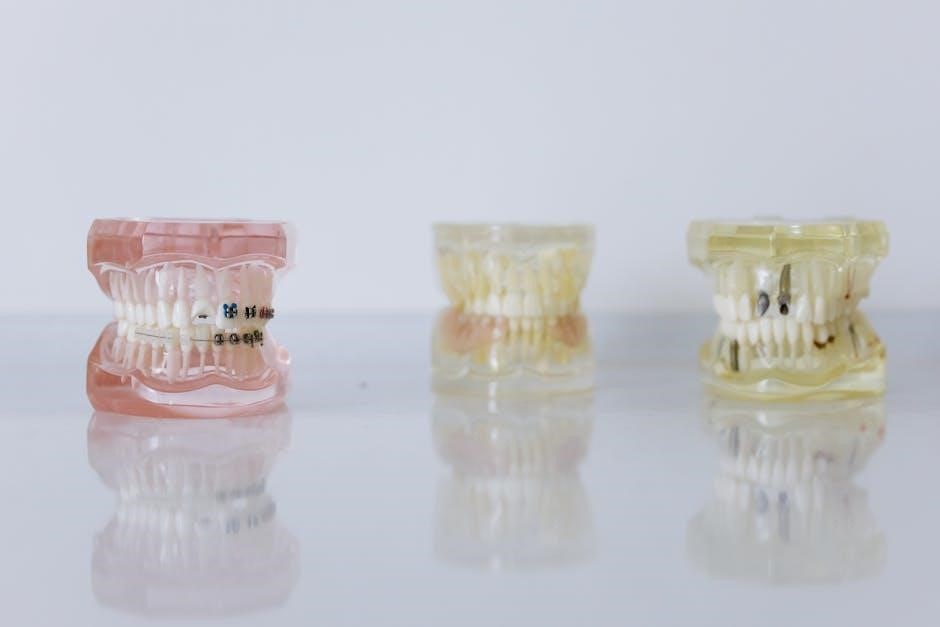
Implants serve as artificial tooth roots‚ requiring diligent post-operative adherence to instructions for successful integration and long-term functionality.
Immediate Post-Operative Care (First 24 Hours)
The initial 24 hours are critical for establishing proper healing. Prioritize rest and minimize physical activity. Expect some bleeding; apply gentle‚ firm pressure with sterile gauze over the implant site for 30-60 minutes at a time‚ repeating as needed. Avoid disturbing the blood clot‚ as it’s vital for healing.
Pain management is key. Take prescribed or recommended pain medication as directed by your dentist‚ even if you aren’t feeling significant discomfort initially. Ice packs applied to the cheek in 20-minute intervals (20 minutes on‚ 20 minutes off) can effectively reduce swelling and pain;
Diet is restricted to liquids only. Avoid hot foods and beverages‚ as heat can increase bleeding. Refrain from rinsing vigorously or using straws‚ as these actions can dislodge the clot. Maintain contact with your dentist‚ remaining within easy reach should any concerns arise. Remember‚ a calm approach is essential during this sensitive period.
Bleeding Management
Some post-operative bleeding is normal following dental implant surgery. However‚ excessive or prolonged bleeding requires attention. Immediately after the procedure‚ apply firm‚ consistent pressure to the surgical site using sterile gauze. Maintain this pressure for a full 30 to 60 minutes without checking frequently‚ allowing a clot to form.
If bleeding persists‚ replace the gauze with fresh‚ sterile gauze and continue applying pressure. Avoid disturbing the clot by spitting‚ rinsing vigorously‚ or using straws. These actions can dislodge the forming clot and restart the bleeding process.
Minor oozing or pink-tinged saliva is expected for up to 24 hours. If bright red bleeding continues beyond this timeframe‚ or if it’s excessive‚ contact your dentist immediately. Remember‚ a stable clot is fundamental to successful implant integration and minimizing complications. Rest and adherence to instructions are crucial.
Pain Control & Medication
Post-operative discomfort is common after dental implant placement. Your dentist will likely prescribe or recommend pain medication to manage this. Take the prescribed medication exactly as directed‚ even if you feel minimal pain initially‚ to proactively control discomfort. Do not exceed the recommended dosage.
Over-the-counter pain relievers‚ such as ibuprofen or acetaminophen‚ may also be used in conjunction with prescribed medication‚ as advised by your dentist. Applying ice packs to the outside of your cheek in 20-minute intervals (20 minutes on‚ 20 minutes off) can significantly reduce swelling and pain.
Report any severe or unmanageable pain to your dentist promptly. It’s important to differentiate between normal post-operative discomfort and potential complications. Maintaining a consistent pain management regimen‚ alongside diligent adherence to all post-operative instructions‚ will contribute to a smoother recovery process.
Short-Term Recovery (Days 1-7)
The first week following dental implant surgery is crucial for initial healing. Expect some swelling‚ bruising‚ and discomfort during this period. Rest is paramount; avoid strenuous activities that could increase bleeding or disrupt the healing process. Gentle walking is generally encouraged to promote circulation.
Dietary restrictions are essential. Stick to soft foods like yogurt‚ applesauce‚ mashed potatoes‚ and broth. Avoid hard‚ crunchy‚ or chewy foods that could put stress on the implant site. Hydration is also vital – drink plenty of water‚ but avoid using straws‚ as the suction can dislodge blood clots.
Maintaining meticulous oral hygiene‚ even with limitations‚ is key. Gently rinse your mouth with a saltwater solution (warm water and ½ teaspoon of salt) several times a day. Avoid brushing directly around the implant site during the first few days‚ focusing on other areas of your mouth. Regular dental check-ups are vital for long-term health.

Dietary Restrictions & Soft Food Choices
Following implant placement‚ a carefully managed diet is paramount for successful healing. For the initial days‚ prioritize soft foods that require minimal chewing‚ protecting the surgical site from disruption. Avoid anything hard‚ crunchy‚ sticky‚ or chewy – these can compromise the implant’s stability and cause discomfort.
Excellent soft food choices include: yogurt‚ applesauce‚ mashed potatoes (ensure they are lukewarm)‚ scrambled eggs‚ smooth soups (broth-based are best)‚ and protein shakes. Gradually introduce slightly more textured foods as comfort allows‚ such as soft-cooked pasta or well-moistened fish.
Crucially‚ avoid spicy or acidic foods‚ as they can irritate the surgical area. Also‚ refrain from using straws‚ as the sucking motion can dislodge forming blood clots. Maintaining adequate hydration with water is essential‚ supporting the body’s natural healing processes. Remember‚ a gentle approach to eating is key during this phase.

Oral Hygiene – Gentle Cleaning Techniques
Maintaining impeccable oral hygiene is vital‚ even – and especially – immediately after implant surgery. However‚ aggressive cleaning can jeopardize healing. For the first few days‚ avoid brushing directly over the implant site. Instead‚ gently rinse your mouth with a warm saltwater solution (1/2 teaspoon salt in 8 ounces of water) after every meal.
After 24-48 hours‚ you can begin gently brushing your teeth‚ carefully avoiding direct contact with the surgical area. A soft-bristled toothbrush is essential. Consider using an antimicrobial mouthwash‚ as recommended by your dentist‚ to help prevent infection.
Flossing around the implant should be approached cautiously. Your dentist may suggest a water flosser for the initial weeks‚ as it provides a gentle cleaning action. Regular dental check-ups‚ as highlighted by programs like the CDBS‚ are crucial for long-term implant health and hygiene.
Swelling & Bruising Management
Post-operative swelling and bruising are normal responses to dental implant surgery. These effects typically peak within the first 24-72 hours and gradually subside. Applying ice packs to the outside of your cheek in 20-minute intervals (20 minutes on‚ 20 minutes off) can significantly reduce swelling.
Elevating your head while resting‚ especially during the first 24 hours‚ also aids in minimizing swelling. Bruising may occur‚ particularly around the surgical site and jawline‚ and is generally harmless. It will fade over time‚ similar to a common bruise.
Pain medication‚ as prescribed by your dentist‚ will help manage discomfort associated with swelling. Remember‚ consistent oral hygiene‚ emphasized in programs like the CDBS‚ supports healing and reduces the risk of complications that could worsen swelling. Contact your dentist if swelling or bruising is excessive or persists beyond a week.
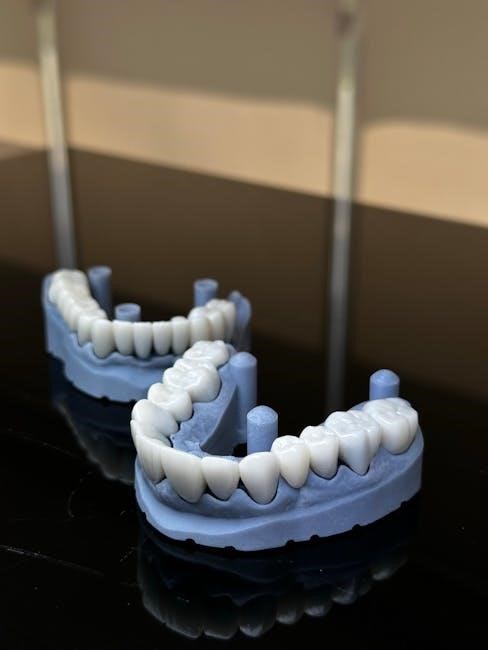
Long-Term Recovery & Integration (Weeks 2-6)
During weeks 2-6‚ the implant undergoes osseointegration – a crucial process where the implant fuses with your jawbone. While initial discomfort subsides‚ continued care is vital. Gradually reintroduce firmer foods into your diet‚ avoiding excessively hard or sticky items that could stress the implant site.
Maintain meticulous oral hygiene‚ gently brushing and flossing around the implant‚ as emphasized by dental health programs like the CDBS. This prevents infection and promotes successful integration. Avoid strenuous activity that could disrupt the healing process.
Regular follow-up appointments with your dentist are essential to monitor osseointegration and ensure proper healing. These appointments allow for adjustments and early detection of any potential issues. Remember‚ a dental implant is a long-term investment‚ and consistent care is key to its longevity and functionality.
Gradual Return to Normal Diet
As the initial healing phase progresses (weeks 2-6)‚ cautiously expand your dietary choices. Begin with soft foods‚ gradually introducing slightly more textured options. Avoid hard‚ crunchy‚ or chewy foods that could place undue stress on the implant site and potentially disrupt osseointegration – the vital fusion with the jawbone.
Prioritize nutrient-rich foods to support tissue repair and overall health‚ mirroring the preventative care focus of programs like the Child Dental Benefits Schedule (CDBS). Continue to avoid extremely hot or cold temperatures‚ as they can sometimes cause sensitivity.
Listen to your body; if a food causes discomfort‚ revert to softer options. Fully resuming your normal diet should occur incrementally‚ guided by your dentist’s recommendations and your individual healing progress. Proper nutrition is a cornerstone of successful implant integration and long-term oral health.
Continued Oral Hygiene Practices
Maintaining impeccable oral hygiene is paramount throughout the long-term recovery and beyond. Continue brushing twice daily with a soft-bristled toothbrush‚ paying careful attention to the implant site‚ but avoiding excessive force. Flossing daily is equally crucial to remove plaque and food particles from around the implant.
Consider using interdental brushes or water flossers to effectively clean hard-to-reach areas‚ mirroring the preventative focus of regular dental check-ups emphasized by programs like the CDBS. Avoid abrasive toothpastes‚ as they can potentially scratch the implant surface.
Gentle‚ consistent cleaning is key to preventing peri-implantitis – inflammation around the implant. Regular professional cleanings‚ as recommended by your dentist‚ are essential for maintaining optimal implant health and ensuring its longevity. Diligent home care complements these professional visits.
Importance of Follow-Up Appointments

Scheduled follow-up appointments are non-negotiable for successful implant integration and long-term health. These visits allow your dentist to monitor the healing process‚ assess bone fusion (osseointegration)‚ and identify any potential complications early on. Initial appointments typically occur within the first few weeks post-surgery‚ then at intervals of several months.
Your dentist will evaluate the implant’s stability‚ check for signs of infection‚ and ensure proper bite alignment. These check-ups are akin to the regular dental assessments promoted by programs like the Child Dental Benefits Schedule (CDBS)‚ emphasizing preventative care.
Don’t hesitate to report any concerns – pain‚ swelling‚ or unusual sensations – between appointments. Consistent monitoring and proactive intervention are vital for a lasting‚ functional‚ and aesthetically pleasing dental implant. Adhering to the recommended schedule maximizes the implant’s lifespan.
Potential Complications & When to Contact Your Dentist
While generally safe‚ dental implant surgery carries potential risks. Be vigilant for signs of infection‚ including fever‚ increased pain‚ redness‚ swelling‚ or pus around the implant site. These symptoms demand immediate attention‚ as they could indicate peri-implantitis – inflammation around the implant.
Implant failure‚ though rare‚ can occur if osseointegration doesn’t happen correctly. Symptoms include persistent pain‚ implant loosening‚ or inability to bear chewing forces. Early detection‚ similar to preventative care emphasized by programs like the CDBS‚ is crucial.
Contact your dentist immediately if you experience excessive bleeding that doesn’t subside with pressure‚ severe or worsening pain unresponsive to medication‚ numbness lasting beyond a few hours‚ or any unusual sensations. Prompt intervention can often resolve complications and safeguard your investment in a healthy smile.
Signs of Infection (Fever‚ Increased Pain‚ Pus)
Post-implant‚ be acutely aware of infection indicators. A fever of 100.4°F (38°C) or higher is a significant warning sign‚ signaling your body is fighting an infection. Increased pain‚ escalating beyond the expected post-operative discomfort and not relieved by prescribed medication‚ requires immediate attention.
Visually inspect the implant site. The presence of pus – a thick‚ yellowish or greenish discharge – is a clear indication of bacterial infection. Redness and escalating swelling around the implant area‚ spreading beyond the initial surgical site‚ are also concerning signs.
Don’t dismiss any unusual symptoms. Bad breath‚ a foul taste in your mouth‚ or difficulty swallowing can accompany infection. Like regular dental check-ups promoted by programs such as the CDBS‚ early detection is key to preventing serious complications and ensuring successful implant integration.
Implant Failure Symptoms
Recognizing implant failure is crucial for timely intervention. Persistent‚ significant pain in the implant site‚ despite medication‚ is a primary indicator. Excessive mobility of the implant – if you can wiggle it with your tongue – suggests a lack of osseointegration‚ the crucial bone fusion process.
Pay attention to functional changes. Difficulty chewing or biting‚ or a sensation that the implant isn’t supporting your bite properly‚ are concerning signs. Inflammation around the gum tissue surrounding the implant‚ that doesn’t subside with proper oral hygiene‚ also warrants investigation.
Like preventative care emphasized by dental benefits schedules‚ proactive monitoring is vital. Numbness or tingling around the implant site‚ or a visible shifting of the implant crown‚ can signal failure. Promptly contact your dentist if you experience any of these symptoms to explore potential solutions and prevent further complications.
Maintaining Implant Health – Long-Term Care
Long-term success hinges on consistent‚ diligent care. Regular dental check-ups and professional cleanings are paramount‚ mirroring the preventative focus of programs like the Child Dental Benefits Schedule (CDBS). These appointments allow for early detection of potential issues and ensure the implant remains stable.
Proper oral hygiene is non-negotiable. Employ specialized brushes and floss designed for implants‚ carefully cleaning around the gumline to prevent peri-implantitis – inflammation around the implant. Avoid abrasive toothpastes that could damage the implant surface.
Remember‚ implants don’t experience decay‚ but surrounding tissues are still vulnerable. Consistent brushing‚ flossing‚ and professional care‚ combined with a healthy lifestyle‚ will maximize the lifespan of your investment and maintain a confident‚ functional smile for years to come.

Regular Dental Check-ups & Professional Cleanings
Consistent professional care is crucial for implant longevity. Schedule check-ups‚ typically every six months‚ allowing your dentist to assess implant stability‚ gum health‚ and identify any early signs of concern – mirroring the preventative approach of programs like the Child Dental Benefits Schedule (CDBS).
Professional cleanings remove hardened plaque (tartar) that home care can miss‚ particularly around the implant site. This prevents peri-implantitis‚ an inflammatory condition threatening implant success. Hygienists use specialized tools to clean without damaging the implant surface.
These appointments aren’t just about cleaning; they’re comprehensive evaluations. Your dentist will check your bite‚ ensuring even distribution of forces‚ and assess the surrounding tissues. Early intervention is key‚ safeguarding your investment and maintaining a healthy‚ functional smile for years to come.
Proper Brushing & Flossing Techniques for Implants
Maintaining impeccable oral hygiene is paramount for implant success. Unlike natural teeth‚ implants lack nerves‚ meaning you won’t feel inflammation as readily – emphasizing the need for diligent‚ proactive care‚ similar to the preventative focus of programs like the CDBS.
Brush gently with a soft-bristled toothbrush‚ using circular motions‚ ensuring you clean around the implant crown and gumline. Avoid abrasive toothpastes‚ which can scratch the implant surface. Floss daily‚ using techniques your dentist demonstrates‚ to remove plaque between implants and adjacent teeth.
Consider interdental brushes or water flossers to effectively clean hard-to-reach areas. These tools complement brushing and flossing‚ removing debris and preventing bacterial buildup. Consistent‚ gentle cleaning is vital‚ protecting your investment and ensuring long-term implant health and a confident smile.