calf strain rehab exercises pdf
Calf Strain Rehab Exercises: A Comprehensive Plan
This plan details a 3-phase rehabilitation for calf strains, focusing on progression from acute care to functional exercises, aiming for a full return to activity.
Understanding Calf Strains
Calf strains are common soft tissue injuries, particularly in sports demanding sprinting and quick directional changes. These injuries occur when the calf muscles – gastrocnemius and soleus – are overstretched or torn. Often, they result from inadequate warm-up, fatigue, or insufficient conditioning. Understanding the mechanism is crucial for effective rehabilitation.
The severity dictates the recovery timeline. Prolonged overuse, especially in endurance activities like long-distance running, can contribute to tendon problems. A comprehensive approach, as outlined in rehabilitation programs, is essential. Remember to always prioritize proper form and listen to your body, stopping any exercise that causes pain or discomfort. Consulting a professional is highly recommended before starting any new regime.
Types of Calf Strains (Grade 1, 2, & 3)
Calf strains are categorized into three grades based on severity. Grade 1 involves mild damage with some stretching of the muscle fibers, causing minor pain and discomfort. Individuals can usually walk with minimal disruption. Grade 2 signifies a moderate tear, resulting in noticeable pain, swelling, and difficulty walking. A limp is often present.
Grade 3 represents a complete rupture of the muscle, causing severe pain, significant swelling, and inability to walk without assistance. These injuries often require immobilization and potentially surgical intervention. Rehabilitation timelines vary considerably depending on the grade, with Grade 3 requiring the longest recovery period. Accurate diagnosis is vital for tailoring the appropriate rehab program.
Initial Management & Phase 1: Acute Phase (Days 1-7)
The initial focus (Days 1-7) centers on reducing pain and inflammation. The RICE protocol – Rest, Ice, Compression, and Elevation – is paramount. Rest involves avoiding activities that aggravate the injury. Ice should be applied for 15-20 minutes every 2-3 hours. Compression helps minimize swelling, and elevation above the heart promotes fluid drainage.
Pain management strategies include over-the-counter pain relievers as needed. Gentle range of motion exercises, within a pain-free limit, can be initiated to prevent stiffness. Avoid any strenuous activity during this phase. The goal is to control symptoms and prepare for the subsequent rehabilitation stages. Protecting the injured calf is crucial for optimal healing.
RICE Protocol (Rest, Ice, Compression, Elevation)
RICE is the cornerstone of initial calf strain management. Rest means complete avoidance of aggravating activities, preventing further damage. Ice application (15-20 minutes every 2-3 hours) reduces pain and inflammation by constricting blood vessels. Compression, using an elastic bandage, minimizes swelling and provides support. Ensure it’s not too tight, hindering circulation.
Elevation, positioning the injured leg above heart level, facilitates fluid drainage and reduces edema. Consistent adherence to RICE in the first 72 hours is vital. This protocol isn’t merely about symptom relief; it actively promotes the healing process, setting the stage for effective rehabilitation. Proper implementation maximizes recovery potential.
Pain Management Strategies
Beyond RICE, effective pain management is crucial during the acute phase. Over-the-counter pain relievers, like ibuprofen or naproxen, can help reduce inflammation and discomfort, allowing for better adherence to the rehabilitation program. However, these should be used as directed and not mask pain that indicates worsening injury.
Gentle movement within a pain-free range can also aid in pain reduction by promoting blood flow and preventing stiffness. Avoid any activity that significantly increases pain. Consulting a sports medicine doctor or physiotherapist is recommended for personalized pain management strategies, potentially including topical analgesics or, in severe cases, prescription medication.
Phase 2: Early Rehabilitation (Weeks 1-3)
This phase focuses on restoring pain-free range of motion and initiating gentle muscle activation. Begin with gentle range of motion exercises, such as ankle pumps and alphabet tracing with the foot, performed several times daily. These movements should be slow and controlled, stopping before any pain arises.
Introduce isometric calf exercises, holding contractions for 5-10 seconds without joint movement. This helps activate the calf muscles without stressing the injured tissue. Progress gradually, increasing the hold time and repetitions as tolerated. The goal is to regain basic muscle control and prepare for more dynamic exercises in the subsequent phase.

Gentle Range of Motion Exercises
These exercises are crucial for preventing stiffness and promoting healing in the early stages of recovery. Begin with ankle pumps – slowly pointing your toes up and down – repeating 10-15 times, several times a day. Next, perform ankle circles, rotating your foot clockwise and counterclockwise.
Another beneficial exercise is alphabet tracing, using your foot to “write” the letters of the alphabet in the air. This encourages movement in all planes. Ensure all movements are pain-free and controlled. Avoid pushing through any discomfort. The focus is on gentle mobilization, not aggressive stretching, to restore normal joint mechanics.
Isometric Calf Exercises
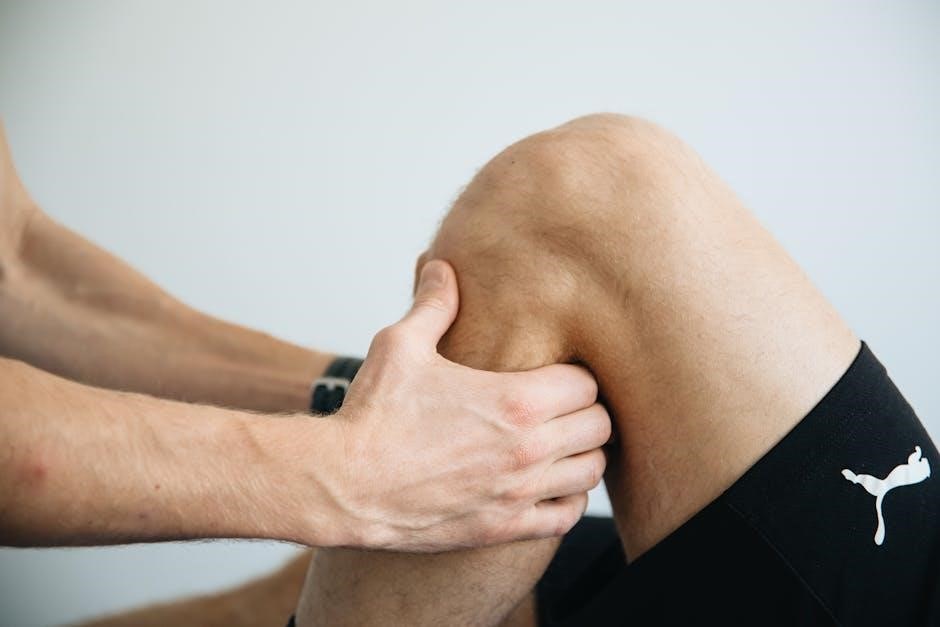
Isometric exercises strengthen the calf muscles without requiring joint movement, making them ideal during the initial phases of rehab when full range of motion is limited. Begin with seated calf isometrics: sit with your knee bent and foot flat, then press your foot against a firm surface (wall or resistance band) as if performing a calf raise, holding for 5-10 seconds.
Repeat 10-15 times. Another variation involves performing isometrics at different knee angles. Crucially, avoid any pain. The goal is to activate the muscle without causing further strain. These exercises help maintain muscle strength and prepare the calf for more dynamic movements later in the rehabilitation process.
Phase 3: Strengthening Phase (Weeks 3-6)
This phase focuses on progressively loading the calf muscles to restore strength and endurance. Begin with double leg calf raises, performing 3 sets of 15-20 repetitions. As strength improves, introduce resisted calf raises using a resistance band, increasing the band’s resistance as tolerated.
Progress to single leg calf raises, starting with support and gradually reducing assistance. Aim for 3 sets of 10-15 repetitions per leg. Monitor for pain; discomfort should be minimal. This phase prepares the calf for functional activities, building a solid foundation for a return to sport. Proper form is essential throughout these exercises.
Calf Raises (Double Leg)
Double leg calf raises are a foundational exercise in Phase 3, initiating the strengthening process. Stand with feet flat on the floor, shoulder-width apart. Slowly rise up onto your toes, focusing on a controlled movement and full range of motion. Hold the contracted position for a brief moment, then slowly lower back down.
Perform 3 sets of 15-20 repetitions, ensuring proper form throughout. Avoid bouncing or using momentum to lift your heels. This exercise targets both the gastrocnemius and soleus muscles, building overall calf strength. Gradually increase repetitions as tolerated, monitoring for any pain or discomfort during or after the exercise.
Resisted Calf Raises (with Band)
Progressing from double leg raises, resisted calf raises introduce an external load to further challenge the calf muscles. Secure a resistance band around your forefoot, holding the ends in your hands. Maintain a stable posture and slowly perform a calf raise, pushing against the band’s resistance.
Complete 3 sets of 15-20 repetitions, selecting a band that provides moderate resistance without compromising form. Focus on controlled movements, avoiding quick or jerky actions. This exercise enhances strength and endurance, preparing the calf for more demanding activities. Monitor for any discomfort and adjust resistance accordingly.
Single Leg Calf Raises (Progression)
Building upon double leg and resisted variations, single leg calf raises significantly increase the load on the injured calf. Begin by performing raises on a stable surface, using a wall or chair for balance if needed. Slowly elevate onto the toes, focusing on a full range of motion and controlled descent.
Progress by increasing repetitions (3 sets of 15-20) and then adding a slight pause at the top of the movement. For advanced progression, perform the exercise on an unstable surface, like a foam pad, to challenge proprioception. Ensure minimal discomfort; stop if pain arises. This exercise is crucial for restoring functional strength.
Advanced Strengthening & Functional Exercises (Weeks 6-8+)
This phase bridges rehabilitation to sport-specific demands. Plyometric exercises, like jumping and hopping, enhance power and explosiveness. Start with low-impact hops in place, gradually increasing height and distance. Agility drills, such as cone drills and shuttle runs, improve change-of-direction speed and coordination.
Focus on proper form and controlled movements to prevent re-injury. These exercises should only be initiated when pain-free with previous stages. A successful return requires completing 30 minutes of slow-paced running without discomfort. Remember to warm up thoroughly before each session and cool down afterward, prioritizing a gradual increase in intensity.
Plyometric Exercises (Jumping & Hopping)
Plyometrics build explosive power crucial for athletic performance. Begin with double-leg hops, focusing on soft landings to minimize stress on the calf. Progress to single-leg hops, maintaining balance and control. Introduce variations like forward hops, lateral hops, and box jumps – starting with low box heights.
Ensure adequate warm-up before each session, including dynamic stretching. Monitor for any pain or discomfort; stop immediately if experienced. Gradually increase the intensity and volume of plyometric exercises over time. Proper technique is paramount to prevent re-injury and maximize effectiveness. These drills prepare the calf for the demands of sprinting and rapid changes in direction.
Agility Drills (Cone Drills, Shuttle Runs)
Agility drills enhance coordination and reactive strength, vital for sports involving quick movements. Start with simple cone drills, focusing on controlled changes of direction. Progress to shuttle runs, gradually increasing speed and distance. Incorporate lateral shuffles and carioca drills to improve multi-directional agility.
Prioritize proper form and technique to avoid compensatory movements that could strain the calf. Maintain a slight bend in the knees and engage core muscles for stability. Monitor for any pain or discomfort, and adjust the intensity accordingly. These drills simulate the demands of sports, preparing the calf for functional activities.

Stretching Exercises for Calf Strain Rehab
Calf stretch exercises are crucial for restoring flexibility and range of motion after a strain. The Gastrocnemius stretch, performed with a straight knee, targets the larger calf muscle. Lean against a wall, keeping your heel on the ground, and feel the stretch in your upper calf.
The Soleus stretch, done with a bent knee, focuses on the deeper soleus muscle. Maintain the same wall lean, but bend your back knee to emphasize the lower calf stretch. Hold each stretch for 30 seconds, repeating several times daily. Always warm up before stretching and avoid pushing through pain.

Gastrocnemius Stretch
To perform the Gastrocnemius stretch effectively, stand facing a wall with one leg extended straight back, heel firmly planted on the ground. Lean forward, keeping your back straight, until you feel a stretch in the upper portion of your calf muscle.
Ensure your knee remains straight throughout the stretch to isolate the gastrocnemius. Hold this position for approximately 30 seconds, breathing deeply to enhance relaxation and flexibility. Repeat this stretch 2-3 times on each leg.

Remember to avoid bouncing or forcing the stretch, as this could exacerbate the injury. Gentle, consistent stretching is key to recovery.
Soleus Stretch
The Soleus stretch targets the lower calf muscle, differing from the gastrocnemius stretch. Begin by standing facing a wall, placing one foot slightly behind the other. Bend both knees, keeping your back heel on the ground throughout the exercise.
Lean forward gently until you feel a stretch in the lower part of your calf. It’s crucial to maintain a slight bend in the back knee to effectively isolate the soleus muscle. Hold this stretch for 30 seconds, focusing on deep, controlled breathing.
Repeat 2-3 times per leg, avoiding any bouncing or sudden movements. This stretch is vital for complete calf rehabilitation.
Proprioceptive Exercises
Proprioception, or body awareness, is crucial for recovery, as calf strains often impair joint position sense. Begin with simple balance exercises, standing on the injured leg for 30-60 seconds, gradually reducing support as strength improves.
Progress to unstable surfaces like a wobble board or balance pad. These tools challenge your balance and activate stabilizing muscles. Incorporate single-leg stance with eyes closed to further enhance proprioceptive input.

Dynamic movements, such as controlled lunges and step-ups, also improve proprioception. Focus on maintaining proper form and controlled movements throughout each exercise. These drills rebuild neuromuscular control, reducing re-injury risk.

Return to Sport Criteria
Returning to sport requires meeting specific criteria, ensuring adequate healing and minimizing re-injury risk. Athletes must complete 3 sets of 15 single-leg heel raises with minimal discomfort, demonstrating sufficient strength and endurance.
A pain-free 30-minute slow-paced run is another key indicator, confirming the calf can withstand sustained activity. Full, pain-free range of motion and no swelling are essential prerequisites.
Functional testing, including agility drills and sport-specific movements, should be performed. These assess the calf’s ability to handle the demands of the athlete’s sport. Gradual return to training, starting with low-intensity activities, is vital.
Preventing Re-Injury
Preventing re-injury is crucial after a calf strain, requiring a multifaceted approach beyond rehabilitation. Consistent stretching, focusing on both gastrocnemius and soleus muscles, maintains flexibility and reduces strain.
Proper warm-up and cool-down routines are essential before and after activity, preparing muscles for exertion and aiding recovery. Gradual increases in training intensity and volume prevent overloading the calf.
Strength training, targeting calf muscles and surrounding areas, enhances stability and resilience. Addressing biomechanical factors, like gait abnormalities, minimizes stress on the calf. Listen to your body and avoid pushing through pain, prioritizing rest and recovery.
Warm-up & Cool-down Protocols
Effective warm-ups prepare muscles for activity, reducing injury risk. Begin with 5-10 minutes of light cardio, like walking or cycling, increasing blood flow. Dynamic stretches, such as leg swings and ankle rotations, improve range of motion.
Prior to intense activity, include calf-specific warm-up exercises, like gentle calf raises. Cool-downs are equally important, gradually decreasing intensity post-exercise.
Static stretches, holding each stretch for 30 seconds, enhance flexibility and reduce muscle soreness. Focus on gastrocnemius and soleus stretches. Consistent implementation of these protocols supports calf health and prevents re-injury, ensuring a safe return to activity.
Importance of Professional Guidance
Navigating calf strain rehabilitation requires expert insight. A sports medicine doctor or physiotherapist can accurately diagnose the strain’s severity – Grade 1, 2, or 3 – and tailor a program accordingly. Self-diagnosis can lead to improper treatment and delayed recovery.
Professionals assess individual needs, considering factors like activity level and injury history. They monitor progress, adjusting exercises to prevent re-injury and optimize healing.
Seeking guidance ensures correct form during exercises, maximizing effectiveness and minimizing risk. They can also identify underlying biomechanical issues contributing to the strain, offering long-term solutions for injury prevention. Don’t hesitate to consult an expert!
Resources & PDF Downloads
Accessing comprehensive resources is crucial for successful rehab. Several downloadable PDF guides detail calf strain rehabilitation programs, offering illustrated exercises and progressive timelines. These resources, often adapted from sports medicine reports (Fields KB & Rigby MD, 2016), provide valuable insights.
Look for materials referencing Manns Surgery of the Foot and Ankle (2014) or Campbell et al’s work in Foot & Ankle Clinics of North America (2009) for evidence-based protocols. Many physiotherapy clinics also offer downloadable handouts.
Remember to verify the source’s credibility and consult with a healthcare professional before implementing any self-guided program. These PDFs supplement, but don’t replace, personalized medical advice.