lennox air conditioner troubleshooting guide
Overview of Lennox AC Troubleshooting
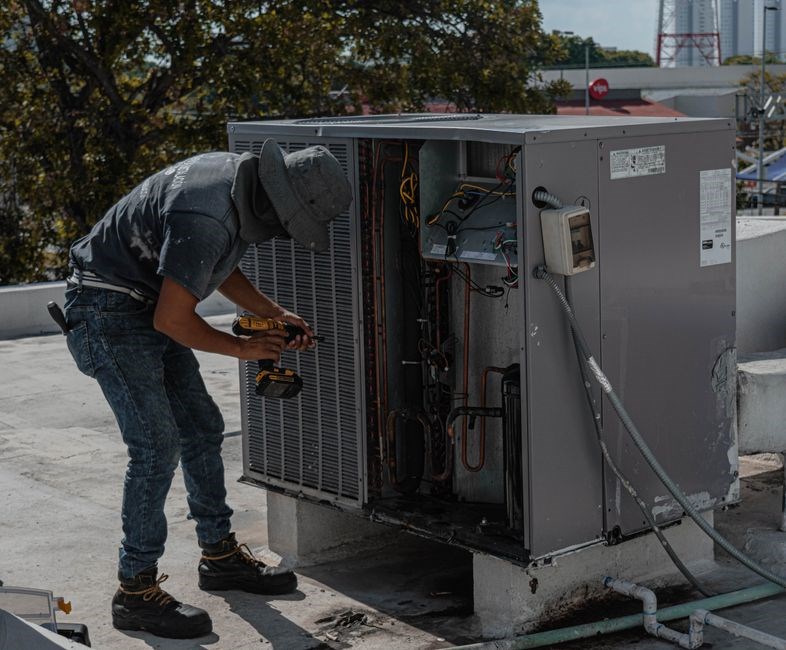
Start by confirming the model and warranty, then inspect key parts: compressor, condenser, evaporator, zone board, thermostat; Check for obvious leaks, dirty coils, and low refrigerant. Use a multimeter to verify electrical continuity and ensure proper stage control. Inspect wiring for shorts.now
Identify the Model and Warranty Status
Begin by locating the unit’s model number, typically found on a metal plate on the indoor or outdoor cabinet. This plate also lists the serial number, which is essential for warranty verification. Record both numbers and note the installation date, often printed on the same plate or in the original service paperwork. Use the manufacturer’s online warranty portal or call the Lennox customer service line to confirm coverage status. If the unit is under warranty, request a service authorization before any repair work. For units past the standard warranty period, review the extended warranty or service agreement that may still apply. Check the HVAC company’s service history logs for prior repairs or component replacements; these records can indicate potential recurring issues. Verify that the thermostat is compatible with the model by consulting the user manual, as mismatched firmware can trigger false fault codes. Finally, ensure that the unit’s electrical service panel matches the rated voltage and amperage specified for the model; an incorrect supply can cause intermittent operation or trigger safety shut‑offs. By confirming the model, serial number, warranty, and service history, you establish a baseline that informs every subsequent diagnostic step and protects against unnecessary repairs or warranty voids.
Typical Lennox AC Components
Lennox air conditioners are engineered around a core set of components that work in concert to deliver efficient cooling. The compressor is the heart of the system, converting low‑pressure refrigerant gas into a high‑pressure, high‑temperature vapor that travels to the condenser. The condenser coil, usually located on the outdoor unit, dissipates heat to the ambient air; its fins must be kept clear of debris to maintain airflow. Inside, the evaporator coil absorbs heat from the indoor air, and the evaporator fan circulates air across the coil. The zone control board orchestrates multi‑stage operation, directing the compressor to run at different capacities based on thermostat input and zone demands. A thermostat (often a digital or programmable model) is the user interface that sends cooling requests to the zone board. The refrigerant lines (both liquid and suction) carry the refrigerant between the indoor and outdoor units; they are insulated to prevent heat gain and condensation. The electric control wiring connects the thermostat, zone board, compressor, and fans, and must be free of corrosion or damage. Finally, the air filter and ductwork play a crucial role in maintaining indoor air quality and ensuring proper airflow across the evaporator coil. Understanding the function and typical placement of each of these components is essential for diagnosing performance issues, identifying potential failure points, and planning preventive maintenance.
Common Cooling Problems
Common cooling issues arise from low refrigerant, dirty coils, or faulty zone boards. Symptoms include weak airflow, short cycling, or no cool air. Inspect filters, check refrigerant pressure, verify stage control for accurate diagnosis. Check for ice buildup, verify sensor accuracy and rule out cold readings
Low Cooling Capacity or No Cool Air
When a Lennox unit delivers weak or no cool air, the first step is to confirm airflow. Measure static pressure; values above 1.5 in WC suggest a clogged filter or blocked evaporator. Next, check refrigerant pressure with a gauge set. Low high‑side pressure (≈ 80 psi) indicates a leak or insufficient charge. Use a leak detector or UV dye to locate the source. If the leak is minor, repair and recharge; if extensive, evaluate cost versus unit age. Verify the zone control board is issuing the correct stage command. A board stuck in stage 1 will limit cooling even if the compressor is capable of stage 2. Inspect the thermostat for proper temperature set‑point and correct wiring. Ensure the outdoor condenser fan runs continuously; a failing fan motor reduces heat rejection and can cause the indoor coil to freeze, shutting the compressor. Examine the evaporator coil for frost; if present, the system is cycling too fast or the refrigerant level is too low. Finally, confirm that the indoor coil is not obstructed by debris or a broken fan blade. Addressing these points usually restores full cooling capacity. If the compressor fails to start, check the capacitor and contactor. A worn capacitor will prevent the compressor from engaging, leading to no cooling. Replace if voltage is below spec. Also, inspect the pressure switch; a stuck high‑side switch can shut the compressor prematurely. After repairs, run a diagnostic cycle to verify that the system reaches the desired temperature within 30 minutes. Keep a log of any changes for future reference.
Overcycling or Short Cycling
Short cycling—when a Lennox unit turns on and off within minutes—often signals a control or refrigerant issue. Begin by inspecting the thermostat: ensure it’s set to a sensible temperature and that its battery or power supply is stable. A faulty thermostat can send frequent on/off signals. Next, verify the zone control board’s stage logic; a board stuck in stage 1 may cause the compressor to shut early. Check the high‑side pressure switch: if it’s tripping due to excessive pressure, the compressor will cycle prematurely. Low refrigerant pressure can also trigger the low‑side switch, causing the unit to stop before cooling completes. Use a gauge set to confirm both sides; values outside manufacturer spec indicate a leak or improper charge. Inspect the condenser fan motor and capacitor; a failing fan reduces heat rejection, raising pressure and forcing the compressor to shut. Examine the evaporator coil for frost; if the coil freezes, the compressor will cycle off to protect itself. Clean or replace the air filter and ensure the indoor coil is unobstructed. Verify that the outdoor unit’s airflow is adequate; a blocked condenser can raise pressure. Finally, test the compressor’s start and run capacitors; a weak start capacitor can cause the compressor to fail during the first few seconds, leading to a cycle restart. After correcting these issues, document the cycle times for future reference and to verify that the problem has been resolved. If the problem persists after all checks, it may be a sign of a failing compressor or a defective pressure sensor; in such cases, professional service is recommended.

Electrical and Control Issues
Check voltage, grounding, and capacitor health. Inspect thermostat wiring for shorts. Verify zone board logic. Test high‑side pressure switch. Ensure proper relay operation. Use a multimeter to confirm continuity and correct stage control. Check wiring.
Thermostat Misconfiguration
Misconfigured thermostats are a frequent culprit in Lennox AC performance issues. Common symptoms include the unit cycling on and off rapidly, never reaching the set temperature, or running in the wrong mode (cooling instead of heating). The first step is to verify the thermostat’s settings: ensure the fan is set to “Auto” rather than “On” to prevent continuous airflow that can mask a cooling problem. Check that the temperature setpoint is within the acceptable range for the Lennox model—most units require a minimum of 68°F for cooling and 60°F for heating. If the thermostat is a programmable model, confirm that the schedule is correctly programmed and that the “away” or “vacation” modes are not inadvertently active. Wiring is another critical area; a miswired thermostat can send incorrect signals to the zone control board. Inspect the thermostat’s wire terminals for proper connections: the common (C) wire should be connected to the C terminal, and the R, W, Y, G, and O (if present) wires should match the Lennox wiring diagram. A loose or disconnected wire can cause the system to interpret a “cool” command as a “heat” command, leading to stage mis‑calls. Additionally, some Lennox units use a separate temperature sensor in the return air duct; if the thermostat’s internal sensor is dirty or the external sensor is mis‑placed, the system may receive erroneous temperature data. Clean the thermostat’s sensor with a soft brush or compressed air, and verify the external sensor’s placement per the manufacturer’s instructions. Finally, consider the thermostat’s firmware: outdated firmware can misinterpret sensor data or fail to communicate with the zone control board. Check the manufacturer’s website for updates and follow the prescribed update procedure. After correcting these settings, reset the thermostat and observe the AC’s response; a properly configured thermostat should allow the Lennox unit to reach the desired temperature and maintain it without unnecessary cycling. If the thermostat displays error codes such as 0x01 or 0x02, consult the Lennox troubleshooting guide; these codes often indicate communication failures between the thermostat and the zone control board. In such cases, replace the thermostat or use a compatible model. Also, verify that the thermostat’s battery is fresh; a low battery can cause intermittent signal loss, leading to erratic AC behavior. For wireless thermostats, ensure the signal strength is adequate; walls and metal ducts can interfere. Re‑repair or replace the thermostat if misconfiguration persists after all checks.
Zone Control Board Malfunction

When the Lennox zone control board fails, the system can exhibit erratic stage changes, never reaching the set temperature, or running in the wrong mode. The board is the brain of the HVAC, receiving signals from the thermostat, sensors, and zone switches, then commanding the compressor, fan, and relays. Common symptoms include short‑cycling, continuous “on” mode, or the unit staying in stage‑1 even when stage‑2 is required. A malfunctioning board often shows error codes such as 0x10 or 0x20 on the display, indicating communication or relay faults. To diagnose, first power‑off the system and inspect the board for visible damage: burn marks, cracked solder joints, or swollen capacitors. Use a multimeter to check continuity of the board’s input and output terminals; a broken trace can disconnect the compressor from the relay. Verify that the board’s firmware is current; older Lennox models may need a firmware update to resolve known bugs. If the board is still responsive, test the relay contacts with a known good relay; a stuck relay can keep the compressor in a single stage. Check the wiring harness for corrosion or loose connections, especially at the Y, G, and O terminals that control cooling, fan, and reversing valve. A common failure mode is the board’s “stage‑1” relay failing to open, forcing the compressor to stay in low‑speed mode. Replacing the board is often the most cost‑effective solution, but before ordering a new part, confirm the board’s serial number matches the unit’s model, and consult Lennox’s technical service guide for the correct part number. If the board is a multi‑zone controller, ensure each zone switch is correctly wired and not shorting the board’s outputs. After replacement, re‑program the board with the factory settings and run a diagnostic cycle to confirm proper operation. If the problem persists, consider that the issue may stem from a faulty thermostat or sensor, and verify those components as well. Additionally, the board’s power supply module may degrade over time, causing voltage drops that prevent proper relay activation. Measure the input voltage with a multimeter; a reading below 120 volts indicates a supply issue. Replacing the power module can restore full functionality without replacing the entire board. Finally, always ensure the unit’s air filter is clean and the condenser coils are free of debris, as airflow restrictions can trigger the board’s safety shut‑off, mimicking a board failure. By systematically checking these components, you can isolate the true cause and restore reliable operation to your Lennox system.
Refrigerant and Leak Troubleshooting
Check gauges for low pressure, use electronic leak detector, inspect coils, seals, and fittings. If leak found, repair, evacuate, recharge to spec. Verify after recharge that pressure matches manufacturer chart. Confirm pressure matches spec exactly.
Low Refrigerant Levels and Leak Detection
Low refrigerant readings often signal a leak. Begin by inspecting pressure gauges; a drop below manufacturer‑specified values indicates loss. Use an electronic leak detector or soapy water on joints, coils, and fittings to locate the escape point. Once found, decide on repair: a simple seal, a replacement gasket, or a full component swap. However, consider the system’s age and warranty status; older units may have multiple aging parts, and a single repair can expose other failures; Many contractors decline to fix older Lennox models due to liability, even if the customer signs a waiver. If the leak is minor and the unit is still under warranty, a professional recharge and repair is advisable. For units beyond warranty, weigh the cost of refrigerant recharge against the potential for future component failure. A thorough leak fix can extend life, but if the compressor or zone board is nearing end‑of‑life, the investment may not be justified. Regular leak checks during seasonal maintenance help catch issues early, preventing costly downtime. Installing a leak‑sensing relay can automate alerts for future monitoring. When a leak is confirmed, the technician evacuates the system, performs a vacuum test, and recharges to the charge specified by Lennox. After recharging, run a temperature differential test to confirm evaporator and condenser temperatures are within the acceptable range. If the differential is off, check for blockages or dirty coils causing low pressure. Document all findings and repair steps in the log today.
Proper Recharge Procedures
Before recharging, evacuate the system with a vacuum pump until the gauge reads less than one torr. Verify all valves are closed and the system is sealed. Connect the refrigerant manifold to the low‑pressure side, set the gauge to the manufacturer’s recommended charge level for the specific Lennox model, and slowly add refrigerant while monitoring pressure and temperature. Use a calibrated thermometer to ensure the evaporator coil temperature stays between thirty‑five and forty‑five degrees Fahrenheit; if it drops below, add refrigerant in small increments. Once the correct pressure is achieved, close the valves, run the unit for at least thirty minutes, and check for any pressure drops or leaks. Perform a temperature differential test: the evaporator should be fifteen to twenty‑five degrees cooler than the ambient air. If the differential is off, inspect the coil for dirt or blockage. After confirming proper charge, document the refrigerant type, charge amount, and any observations in the service log. Always wear protective gear and follow local regulations for refrigerant handling. A correctly charged Lennox unit will operate efficiently, reduce energy consumption, and extend component life. For multi‑stage Lennox systems, ensure each stage’s refrigerant line is correctly charged; some models require separate charge points. Use a pressure‑temperature chart to verify the system is operating within the specified range for each stage. After recharging, reset the zone control board to clear any fault codes that may have been triggered by low pressure. Record the test results and schedule a follow‑up inspection in six months to ensure the system remains stable.

Maintenance and Prevention
Regular filter changes, coil cleaning, and checking for debris keep Lennox units running efficiently. Inspect fan belts, test thermostat settings, and verify proper airflow. Schedule annual professional checks to catch early leaks and maintain warranty coverage. Keep systems efficient and safe.
Routine Filter and Coil Cleaning
Routine filter and coil cleaning keeps a Lennox air conditioner running efficiently; First, turn off the unit and disconnect power for safety. Open the front access panel and locate the intake and return filters. Replace any clogged filters with new ones that match the manufacturer’s size and rating. Next, clean the evaporator coils: use a soft brush or a coil‑cleaning solution designed for HVAC. Gently scrub the fins to remove dust, pollen, and debris, being careful not to bend the delicate metal. Rinse the coils with a low‑pressure water spray and allow them to dry completely before reassembling. Inspect the condenser coils outside; a garden hose with a gentle spray can remove dirt buildup. Check fan blades for obstructions or damage and wipe them with a damp cloth. Verify that all vents and registers are clear and that airflow is balanced. After the coils dry, examine refrigerant lines for visible damage or leaks. Use a soapy water solution to spot bubbles; if leaks are found, schedule professional service. Inspect the blower motor and capacitors for wear, and vacuum the blower housing to remove dust. Run a short test cycle to confirm proper airflow and temperature readings. Document the cleaning date and any observations for future reference. Replace filters every 90 days or sooner in dusty environments, and keep a maintenance log to track changes and issues. Additionally, checking the blower belt for wear and replacing it if worn can prevent noisy operation and maintain airflow. By following these steps, homeowners can avoid costly repairs and keep their Lennox unit performing at peak efficiency for years.
Professional Service and Warranty Considerations
When a Lennox unit shows persistent problems—such as unexplained short cycling, erratic temperature swings, or a sudden drop in cooling capacity—professional service is essential. Certified technicians can perform advanced diagnostics, including pressure testing, refrigerant charge verification, and zone board inspection. They also have access to OEM parts and can confirm whether a component is still covered under the manufacturer’s warranty or a local service contract. If the unit is older than five years, many parts may be out of warranty; in that case, the technician will provide a cost estimate for repairs versus replacement. It’s important to review the warranty terms before any work: some warranties require that only Lennox‑approved technicians perform service, and unauthorized work can void coverage. Additionally, a professional can evaluate the unit’s energy efficiency rating and recommend upgrades, such as a variable‑speed compressor or a smart thermostat, which may qualify for rebates or tax credits. Finally, documenting every service visit and keeping a maintenance log helps protect warranty claims and ensures that any future issues are traced to prior work. By engaging a qualified technician, homeowners can avoid costly mistakes, maintain compliance with warranty conditions, and extend the lifespan of their Lennox system. Customers should also verify that the installation meets local code requirements and that the unit’s SEER rating aligns with the latest efficiency standards, as this can impact both performance and eligibility for incentive programs. Regular inspections help identify wear, homeowners to replace parts and thereby extending lifespan of the system. now